
There is nothing like a nice long ride on the trails. My buddies and I enjoy extended Mountain bike and camping weekends. They allow us to get out, unplug, and take what the trails give us.
We try to incorporate at least one long ride per trip if not more depending on what our bodies are telling us. Our last trip out to the Brevard, NC we took an almost 19 mile ride which was pretty awesome. On these getaways more so then on rides around the house there are some essentials that are needed because of these longer rides.
So what are the essentials needed for a long mountain bike ride? Below is a list of 23 essential items needed for the longer mountain bike rides. There are several categories that will be broken down below from nutrition, electronic, comfort, and mechanical.
23 essentials (in no particular order)
- Snacks (Nutrition and Hydration)
- Hydration pack (Nutrition and Hydration)
- Water filtration (Nutrition and Hydration)
- First Aid kit (Comfort)
- Protective eyewear (Comfort)
- Sunscreen (Comfort)
- Chapstick (Comfort)
- Rain gear (Comfort)
- Trail map (Electronic or other wise)
- Bike computer (Electronic)
- Heart rate monitor (Electronic)
- Phone (Electronic)
- Pocket charger (Electronic)
- Spare tubes (Mechanical)
- Patch kit (Mechanical)
- Co2 cartridges (Mechanical)
- Bike Pump (Mechanical)
- Shock Pump (if needed) (Mechanical)
- Multi-tool (Mechanical)
- Tire levers (Mechanical)
- Zip ties (Mechanical)
- Masterlink (Mechanical)
- Toolkit (Mechanical)

Nutrition and hydration
1. Snacks
This is a short ride essential as well as a long ride essential. The biggest thing with the longer rides is to have a variety of snacks for different legs of the ride. Some go to’s for our crew are Jerky, Protein bars, gels, pretzels and candy.

The energy boost from a pack of Sour Patch kids is essential to keeping our energy up on the harder and/or longer rides. I will also add energy drink to this section as well. I usually have a gatorade sitting in the cage on the frame for a change of pace when it comes to hydration as sometimes you just need something other than water.
2. Hydration pack
Hydration is essential for just about everything but especially on the long rides where you are expending so much energy and sweating profusely. A good hydration pack will also give you the storage necessary to carry the rest of the items on this list.
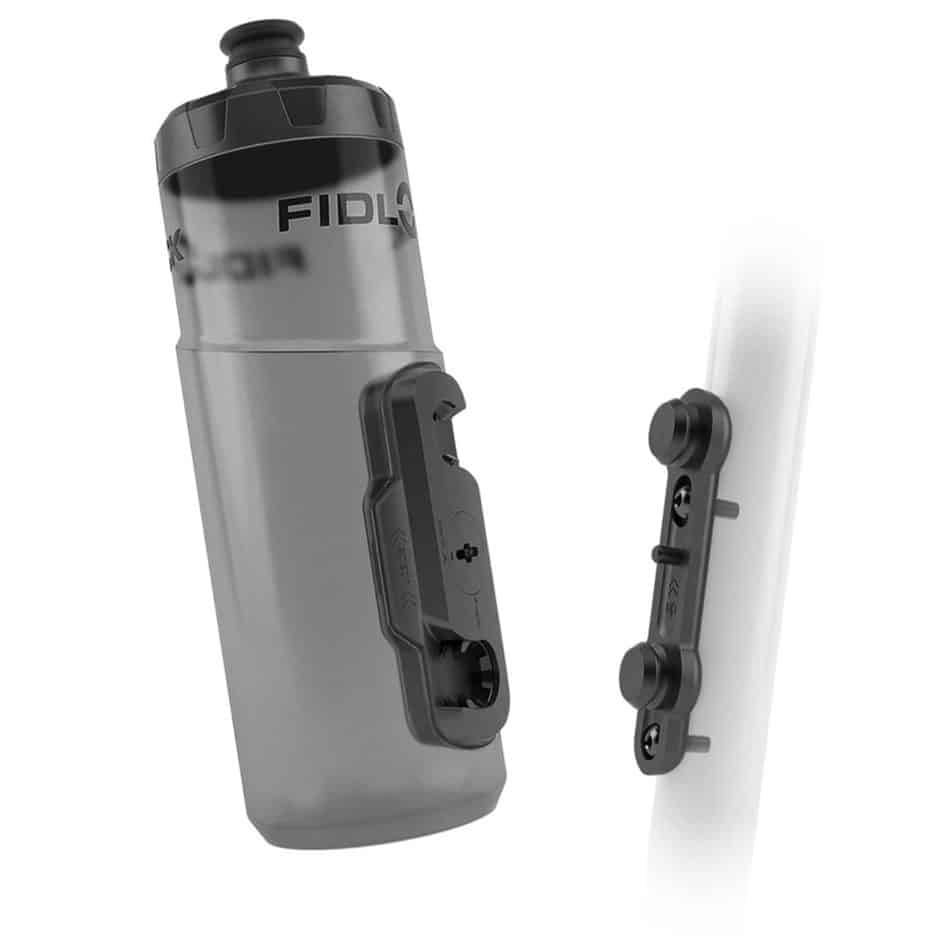
For short rides I just ride with my Fidlock bottle and cage. It holds enough water for most short rides and with its design, I never have to worry about the bottle falling off the bike like my previous cages.
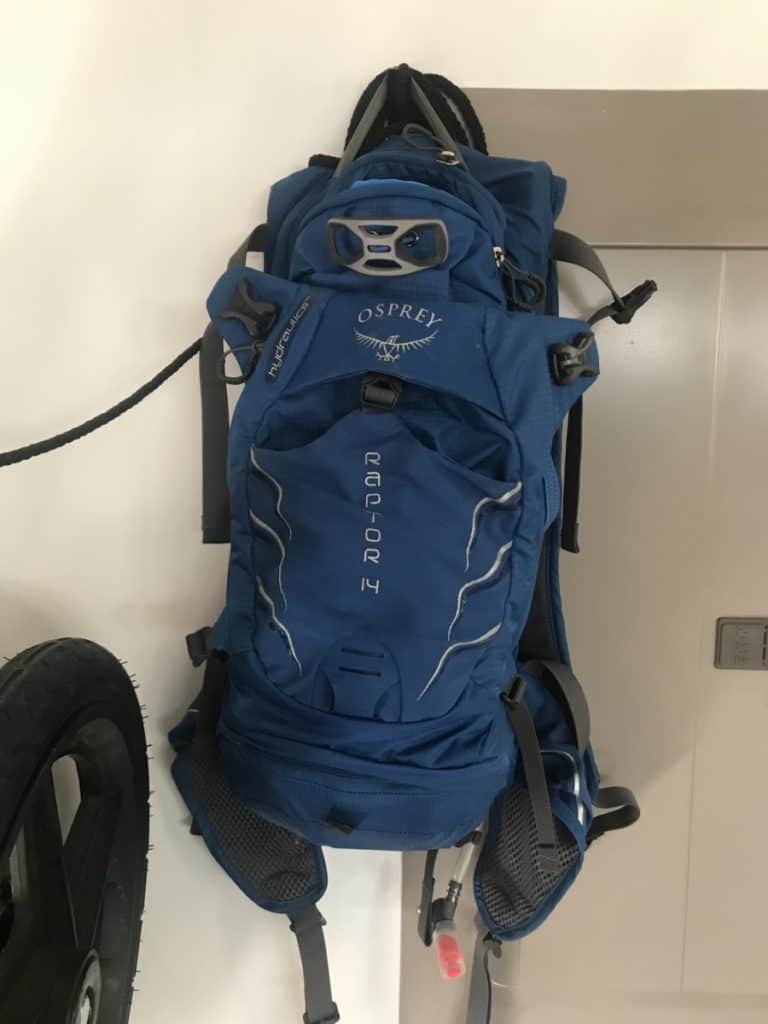
For the longer rides, I use to use Camelbak packs but recently upgraded to a 3 liter Osprey which has a ton of room for water, extra Gatorade, snacks and other necessary items on this list.
3. Water filtration
Water is key on the long rides and your hydration pack can only hold so much. I am glad that Jeremy and Jason both carry a water filtration setup like these on Amazon. I now have one ready to go in my pack on any of our rides.
On that 19 mile ride I ran completely dry of the 3 liters in the hydration pack and two bottles of Gatorade. I was able to use one of their filters to fill up both Gatorade bottles and some of the Camelbac with fresh water from a mountain stream to finish out the ride.
Comfort
4. First aid kit
There are almost always bumps and scrapes on rides but you always want to be prepared. Its always good to have a compact first aid kit ready just in case.
5. Eye protection
Depending on trail conditions you could find yourself dealing with mud or dust or debris. A pair of clear saftey glasses are great at keeping stuff out of your eyes. They also work well at helping keep your eyes from watering up during the long descents. If its a really sunny day a pair of shades may be in order so you can be able to focus on the line instead of squinting through the glare.
6. Sunscreen
This one follows the same reasonings of #4. If you are on a trail with little protection from the elements, more specifically the sun, and sunscreen can prevent you from regretting your ride the next day. If you get one that also contains some lotion it could also help prevent or limit windburn on colder days.
7. Lip Balm
This follows #4 & #5 in regard to staying comfortable in the elements while riding. Lip Balm is something I wish I had on some of our earlier long rides as lack of hydration and the cold caused bad chapping and cracking lips. Suggestion here is to get one of the ones that has a high SPF to not only keep your lips from drying out but also keep them from getting burnt.
8. Rain gear
Pay attention to the weather report and be prepared for rain if you need to be. I nice packable and breathable rain jacket would be nice to prevent you from getting utterly soaked. Being soaked can weigh you down which could slow you down.
Electronic or other wise
These items are mainly electronic with the exception of the trail map which could be either a physical copy or an electronic copy. The rest are items that will help you get the most out of your ride.
9. Trail map (Electronic or other wise)
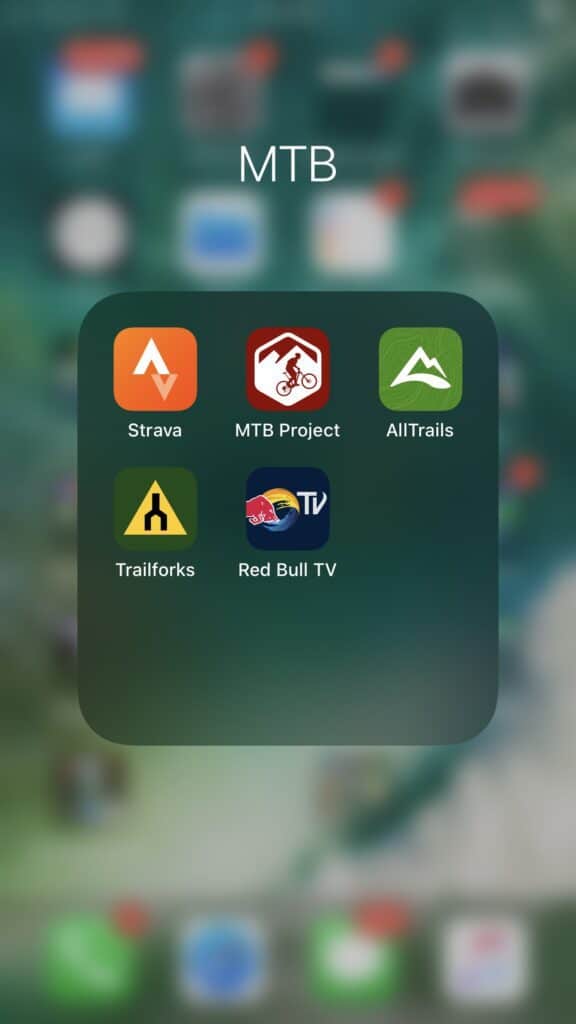
This is one that you can go either way with. I use several apps on my phone to handle locating trails, track distance and help us pick which trails we want to try out.
Jason is big on the physical copy and usually brings either a physical map or book of trails for the area. On our trip in October 2018 to Stokesville and Massanutten, he brought “Mountain Biking Virginia” which he picked up on Amazon. If you are interested in looking for trail books in your area check out Mountain Bike Trail books on Amazon.
10. Bike computer (Electronic)
To get a true and accurate representation of how many miles you are riding or how fast you are riding you are going to want to get a bike computer. These are really easy to setup and as long as you know your tire size you are good to go.
It uses the revolution of your bike tire to determine how many miles you have traveled as well as how fast you are going. Yes there are apps on your phone for this but depending on reception and settings you might end up with a lower amount of miles calculated.
Some of the apps pause when you break which is good but could be delayed when you get rolling again.
11. Heart Rate Monitor
A heart rate monitor is good for riders who want to be able to manage their output on long rides. By listening to your body this could lead to a much more enjoyable ride with fewer stops to rest.
A previous setup of mine was a combination of a bike computer and heart rate monitor. It was a Garmin with the additional cadence sensor that attached to the crank. It also had a strap for the handle bar or I could wear it on my wrist.
This was originally purchased for when I was running marathons but easily converted over to what I needed with my bike. Currently I just use my Garmin watch that I use all day long.
12. Phone (Electronic)
The phone is useful for various reasons. It can be used for tracking your trail rides, calling for help in an emergency or snapping pictures and video.
13. Pocket chargers (Electronic)
With running the phone for trails, pics and videos as well as your other electronic needs for your long rides its good to have a backup charge ready to go when you need it. I have a couple of small pocket chargers that carry a small amount of juice for emergencies but recently picked up this solar charger a year ago.
This is a really nice item to have that allows you to charge it up prior to getting out on the trail as well as using mother nature to help charge it back up as you are riding around. I usually get three to four cell charges while also charging my watch as well once the unit itself is fully charged from home.
Mechanical
14. Spare tubes (Mechanical)
Two spare tubes are a must as you want to be prepared for the worst case scenario. These are items that you can zip tie to your frame or store in you hydration pack if there is enough room. If you ride long enough you will run into this problem.
Whether it is an issue with running over something that pierces the tire or getting a pinch flat from running too low of air pressure on the tires and hitting a section of rocks that just do a number on your bike. Of course if your running tub less then this doesn’t apply to you.
15. Patch kit (Mechanical)
Yes, I just mentioned bringing two spare tubes but you can never be too prepared and these things don’t take up that much space in the pack. Really easy to use as long as you can identify exactly where the leak is. This is something you can pick up from just about any big box store with a sports department or your local bike shop.
16. Co2 cartridges (Mechanical)
If you have ever had a flat out on the trail then you know why this is on the list. Having to pump a new tube with a little pump that is usually carried out on the trails is nearly impossible and takes a long time.
Using one of these CO2 cartridges pumps allows you to quickly fill the tube which you can then finish filling with your regular hand pump. This is also great for the tub less tires to help set the bead quickly.
17. Bike Pump (Mechanical)
As mentioned in the previous section a small bike pump is necessary on long rides because the Co2 pumps won’t last for ever. Its good to use a combination of the two to get the maximum benefit. Plus this is a great forearm workout!
18. Shock Pump (if needed) (Mechanical)
On a lot of the newer higher end bikes whether they are hard tail or squish, they now offer the option to add and remove air from the shock to help adjust the bike to the riding conditions. Having the pump with you allows you to adjust on the fly if you need to.
19. Multi-tool (Mechanical)
I absolutely love my little Crank Brothers all-in-one multi tool. It has come in handy out on the trail as well as around the house. It is quite compact and easy to store in either your shorts or your bag. You never know when the trail will work something loose on your bike and you will need to make a quick adjustment.
20. Tire levers (Mechanical)
These go in line with the tubes and pumps. These little tools are a life saver when you have to change out tunes or make a patch. These little guys make a tube repair quick and easy while saving your finger some unnecessary pain.
21. Zip ties (Mechanical)
If you ride long enough you know there is always a need for these guys, especially after a crash. These are good to have for strapping extra tubes to the frame of the bike pre-ride but also useful for tidying up the cabling on the front of the bike.
They are also useful for post crash fixes. Whether its needed to hold on your lever that busted off after a crash, re-attaching your bike computer or a last minute add on of your light if you haven’t made it back before it gets dark.
22. Masterlink (Mechanical)
Check your chain before going out to establish whether or not you even need one. If you bike is equipped then you are going to want a spare. We were out on a ride once, I believe in Brevard, NC, when Jason had an incident with his Trek and the master link separated.
Talk about a needle in a haystack, trying to find that thing was impossible. Having an extra Master link will ensure you won’t end up having to push or carry your bike back the rest of the way. If you do have this problem check out my post on hike a biking which discusses the different ways you could tackle this task.
23. Toolkit (Mechanical)
Yes, I know that I already have a couple of items listed above but these kits contain much more than the few items listed above. There are several out there that simply roll up and won’t take up to much room in your pack. There are others that come in a kit you can attach to the bike itself.
Related Questions
RQ1. How do I carry all this gear !?!
This is a really great question that comes up on these long essential gear posts. If you are riding with a group the question can be answered easier. Simply divide up some of the items among your crew so that not one rider is carrying the entire load.
Another option is to ensure you have the right type of pack for the ride. Shorter rides you can get away with a more streamlined and lighter pack. Longer rides you are going to want a larger pack that can store more items.
Don’t worry too much about the load at the beginning of the ride because as the ride rolls along you will be lightening the load of the water and snacks you consume.
RQ2. How do you prepare for longer and tougher rides than you may have at home?
This is another good question that I touch on more in this post. The key is to make an effort to get in as many rides that mimic what you are getting ready to go on. In our case we combined a set of multi-use trails in a park that had the best in elevation challenges as well as set of trails that had technical sections, pump track and solid single track.
Combining the two gave us 14 miles of trails that we could knock out in a couple of hours when we pushed ourselves.