
In an effort to make it easier for my kids and me to grow in the sport of mountain biking we have been designing and building some trails in our backyard. We recently upgraded and moved from a 0.27-acre lot to a much larger 0.8-acre lot.
While this doesn’t seem like a drastic change to some, there is still more than enough room to build our own personal trail within the back yard. This allows me to help ease my kids into the sport of mountain biking and get them away from their electronic devices.
Our trail includes some of the basic stuff they will encounter out on a typical trail as well as some of the more advanced obstacles that they could come across while out on the trail. In this post, we are going to dive into these obstacles as well as give tips on how you can incorporate them at your own place.
Some basics
In our previous article on making mountain biking fun for the kids, we discussed how to make a fun trail with and for your kids. In an effort to help them and yourself better you will need to mix things up.

Nothing is worse than putting a ton of effort into your backyard trail and not taking it to the next level. I say this because with kids it is easy for them to lose interest and just want to head in for something different.
With more and more emphasis being put in e-sports it seems nowadays kids have more of an “excuse” to be tied up in video games. With something fun and challenging in your own backyard you might have a chance to pry them away for some fun and exercise.
Navigating the woods
If you are lucky enough to have some wooded property in your back yard this part is pretty straight forward. As in the previous article, The #1 tip for Building fun backyard MTB trails for the kids, walk the property with your kids and talk about what you are planning to do in this next stage.
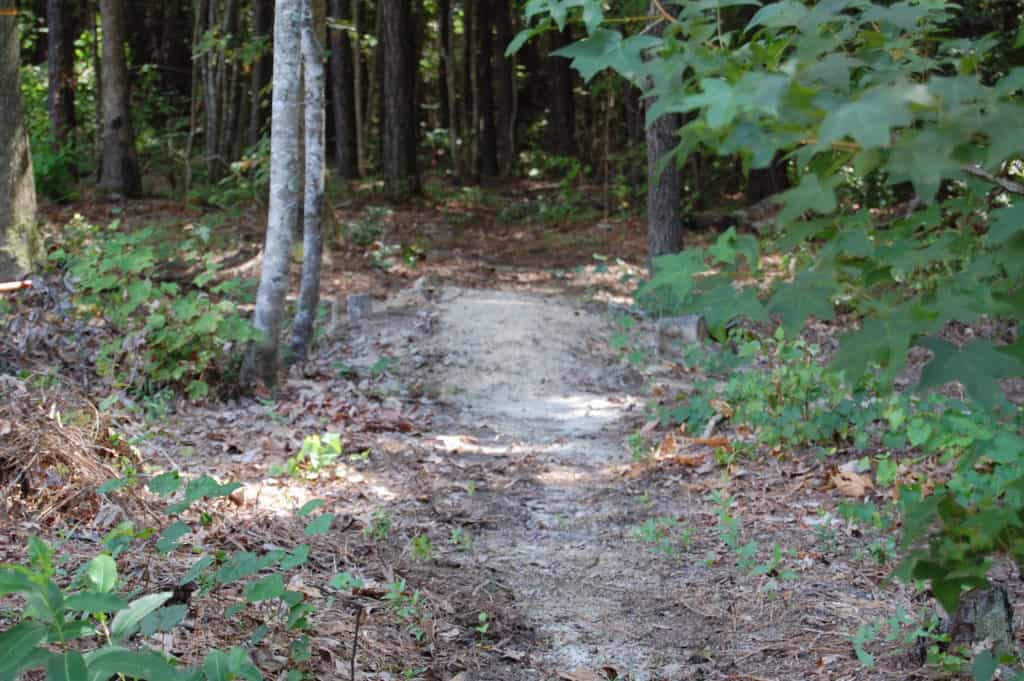
While there are all sorts of mountain bike styles as found in this article, more than likely you will be building more of a cross country trail. Simply put, it’s a cross between single track and greenway, fire roads or in our case open backyards.
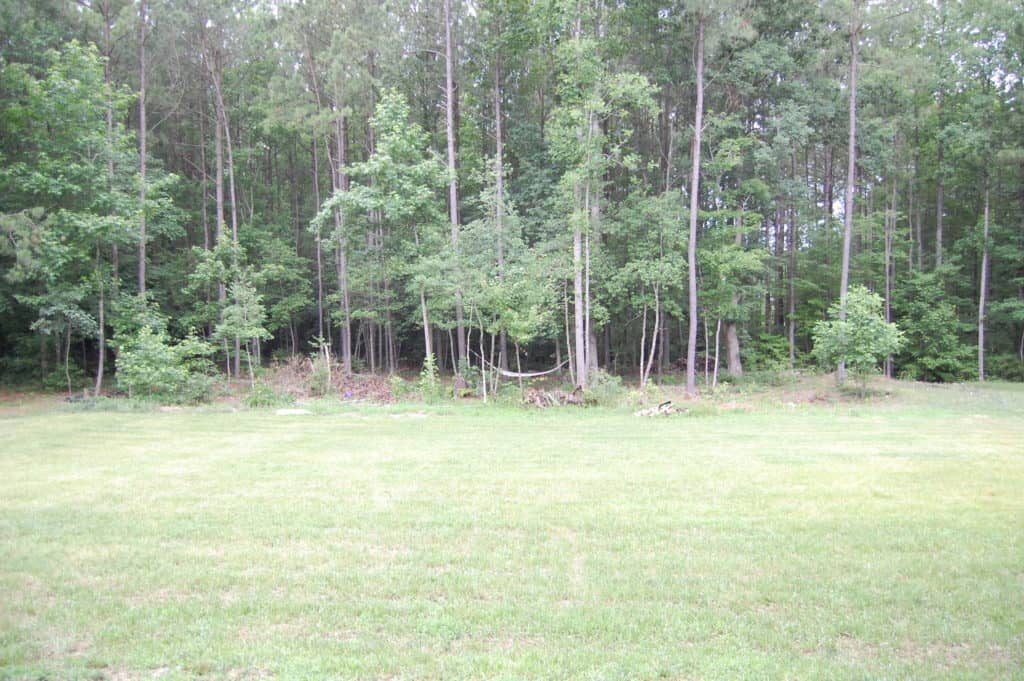
I always talk to the kids about having two separate lines where possible when building our trail if the condition presents itself. For example, in the image below we have several humps in the back of our property near some trees.
The A-line will include those humps for rides confident enough to try and tackle them. For riders wanting to keep up speed or beginners still working on basics, they can take the B line.
The main take away from this is giving you and/or your kids the ability to navigate through various widths of woods. This takes path width, length and turns into consideration. While the original trail is pretty wide open the section in the woods will purposefully be made a bit tighter.
In my experience, there are a number of trails out there where the handlebars barely make it through. They need to be ready to tackle this obstacle and by presenting it in your yard gives them that opportunity.
Your yard isn’t wooded?
So your yard isn’t wooded or doesn’t have enough trees to help you our your kids to practice riding through trees? Run to your local hardware store and purchase some trees.
You can usually find some pretty inexpensive trees if you keep an eye out. Not only will this give you the ability to practice it will also add some shade to your back yard which is usually a nice thing to have in the summertime.
You don’t want to plant them permanently? That’s ok, you could grab some smaller trees that can simply be added to pots and placed in different places in your yard year-round. One good example would be to get some fruit trees that could serve two purposes! Win-Win!
Switchbacks
Usually, when you are out on the trail a switchback is placed in a portion of the trail where you have built up a bunch of speed and need to navigate steep terrain. In a backyard trail, you may want to add one of these simply due to the lack of space.
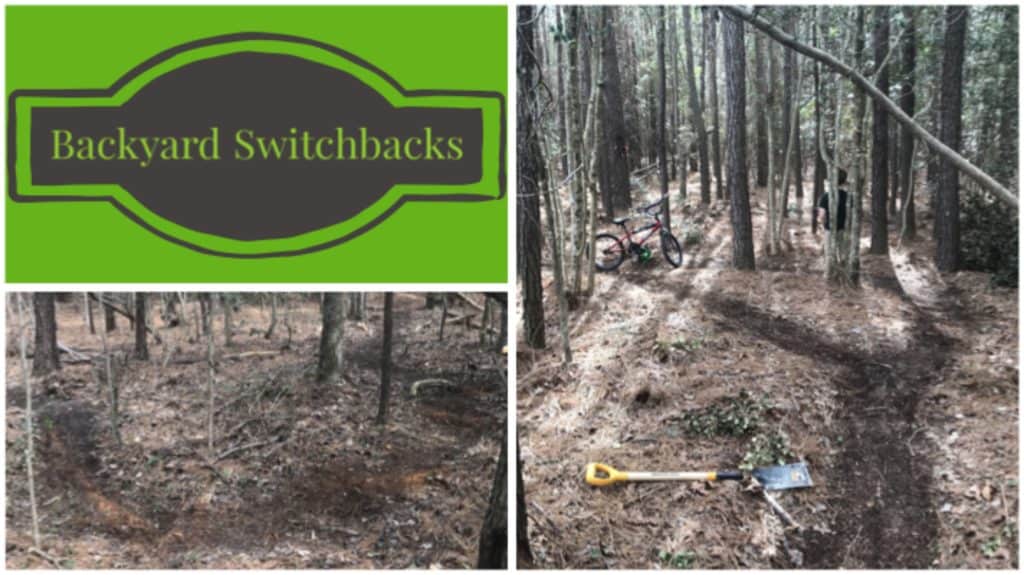
On our backyard trail, we have added one to help fit more trail into the woods. This will take the kids some time to get used to and to be quite honest I had to learn to attack it better as it caught me the first couple of times.
The switchback obstacle is one of the best obstacles to help teach your kids the art/skill of choosing the proper line. Take the wrong line in a switchback and you could kill all momentum needed for that next section of an uphill trail. Do that and you will more than likely be hike a biking until you reach the next flat section.
Drops
One of the most fun obstacles that my kids love is the various drops that are in the back yard. These can be man-made by mother nature over time. In our backyard, we have a combination of both.
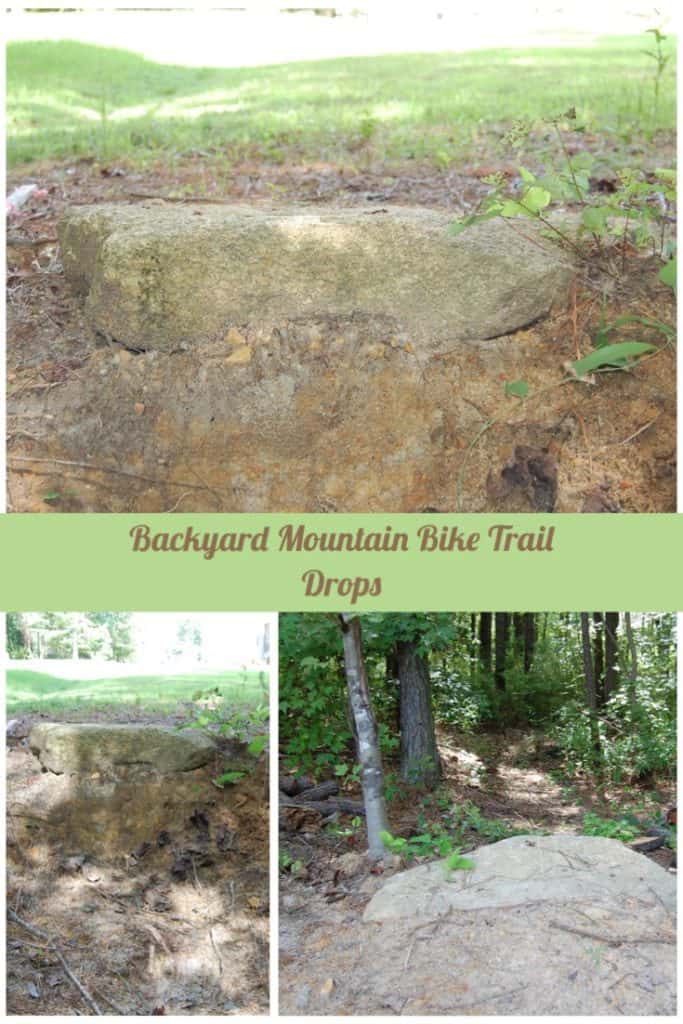
With the way our backyard drains towards the creek on the bordering property, there are several areas where fallen trees and erosion have led to small drops perfect for my 5-year-old.
My 8 year old needed something a little more drastic and of course I needed something that I could use to practice hucking off of.
Foster’s initial drop was created by using old plywood and a piece of an old stump. This was elevated about six to eight inches off the grass in our backyard initially when we first started building stuff in 2017.
Taking things a step further I have been working on adding more elevate my skills. The key is to set things up with enough space to build up speed on the approach of the drop as well enough space to stop or carefully flow back into the trail.
In our state, North Carolina, you can usually find some rock simply by digging in the ground just about anywhere. When they were digging up our yard they managed to dig up a nice slab of some.
With the proper placement at the beginning of one of the trails and the work of a shovel of pic axe, I have been able to make a nice drop to practice prior to meeting up with the guys.
And of course, once the kids get better it’s going to be awesome to see them tackle this drop as well!
Jumps
This is a must to have in your backyard trail. It never fails, I come upon something out on the trail and it feels like I nailed the jump. That is until you check out the video and you only got an inch off the ground.
That or you come to a tabletop jump, case the first one and every other one after that. Story of my life. No matter how many times I hit the trails I find it hard to nail the jumps.
This is due to the frequency at which I am able to hit a trail with this feature. The first time I practiced the jump in our backyard the night before hitting the trails with my buddies we all noticed a big difference.
When it comes to adding jumps in your back yard these can be added at preexisting elevation changes, Mother Nature made mounds or built by hand.
There are numerous videos and images on building kickers or jumps out of wood that can be incorporated into your backyard trail but the best way to incorporate this, in my opinion, is to try and use what Mother Nature gives you.
In our instance, as mentioned in these articles, in the center of the kid’s trail we have a natural mound that was easy to modify. Initially, this was done simply by using a flat head and standard shovel.
At first, it was a simple roller as a way for the kids to practice riding up and over steeper obstacles. But wanted a little more out of this obstacle.
I modified one side to act as smooth up and over while adjusting the other side to allow me to work on jumping correctly. As you might expect though the kids also tried to roll over this side.
The problem is you need to have a bit more of a defined lip of the jump in order to get a decent height out of the jump. It was a little entertaining seeing my two kids and the neighborhood kids have this look of hitting a speed bump too hard to fast.
Rock Garden
This is an awesome technical feature to add but not all will be able to do it. It is best suited for sections of yard with a moderate slope that allows the rider to use the momentum to keep you rolling.
If you don’t have the slope needed for this you can build one. This can be done in two fairly simple ways.
The first would be to create a mound of soil that you could ride up onto and then proceed down the other side where you would create your rock garden. Depending on how you prepare you could have a jump going in one direction and a rock garden going the separate direction.
Dirt in short supply but you have the rock? If this is your case then build up a platform where you can ride up or walk up and then ride down the rock garden. Picture a rock climbing wall on a kid’s playground but less of an incline and more rock.
Man Made features
I know what your thinking, in some way just about every obstacle listed above could be considered man-made especially if Mother Nature didn’t provide the optimal environment in your backyard. The features in this section though are almost exclusively features that have to be man-made.
For example, while theoretically, you may be able to locate a scenario where you could make this work with what Mother Nature gives you. This is highly unlikely and if you really want one of these then you are going to have to spend a little cash to make it happen. The same goes for a pump track, however, you could make this happen.
Teeter Toter
A teeter toter can be a really fun test of balance for you and the kids. The first one can be really small like the image to the right. For the older kids and adults, you can go bigger.
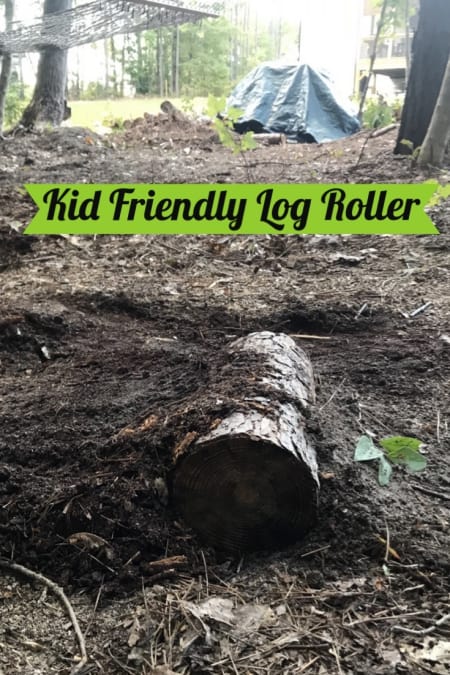
There used to be one at Crabtree park that I believe was around two to three feet tall but was cut down due to insurance liability reasons. If memory serves me the basically turned it from being a teeter toter into an up and overusing the existing wood. It resembles the same as a log roller minus the logs.
The Teeter toter obstacle does several things for the rider. First, the rider has to work on balance as the width of the teeter toter is usually between 4-6 inches wide which doesn’t leave a lot of room for error.
As the rider climbs on the teeter toter obstacle, they need to manage their balance all the way through.
Second, the rider has to stay focused all the way through their pass on the teeter toter. If they lose focus early it isn’t too bad but mid-way through or as the teeter toter comes down could spell trouble if the midpoint of the teeter toter is really high.
If you lose focus mid pass and have to bail you can damage the bike or even hurt yourself.
The third thing you are going to need is good hand-eye coordination. As you approach the teeter toter obstacle, you are going to need to line yourself up as close to the center as possible.
You are going to want to carry enough speed into the teeter toter obstacle to get you midway as soon as possible at which point you are going to want to slightly hit the brakes.
This slows you down enough to allow the teeter toter to slowly come down on the other side. You do not want it to come slamming down or you may end up damaging the teeter toter or causing yourself to crash as you exit the obstacle.
Skinny / Skinnies
Skinnies are similar to teeter toter’s in that they are fairly skinny but these typically don’t move.
Skinnies are similar to teeter toter’s in that they are fairly skinny but these typically don’t move. While this is another obstacle that could be done with the help of Mother Nature but it’s going to be a lot safer if it’s man-made.
Grab some 4×4’s or 6×6’s that you can cut into pillars and sink into the ground for stability. Once this knocked out you can secure a 1×4 or 1×6 to the pillars.
If you have a creek you could take a portion of the 4×4 or 6×6 and span the creek instead of building a full-on bridge. The key to any skinny you plan on building is a smooth approach.
My daughter is really into gymnastics so I created a tiny balance beam that essentially is a 4×4 that is resting on smaller pieces of 4×4 near the end. I cut notches into the legs of the balance beam sot that it wasn’t too high for her.
This was done back when she was 3 and can now be added to the backyard bike trail as their initial skinny. Now that she is almost 6 she needs something a little more substantial which leads me to the newest project for our back yard bike trail.
A new elevated balance beam will double for our advanced skinny sitting at approximately a foot and a half off the ground. The biggest thing is going to be finding the right placement that allows for a fairly straight-on approach.
Trails built now what?
Now that you have spent all this time on building the trail you are going to want to do your best to make it last. Work with your kids to set up a maintenance schedule and ensure that they know the rules of the trail.
If they aren’t paying attention to how they are attacking the trail this could lead to frustration with an obstacle or feature as well as ruing all your hard work.
For example, this past week we finished the main kids portion of the trail. While my kids know the rules some friends came by and started hitting some of the features.
Unfortunately, some were hit going in the wrong direction that led to damage to some features. After a short chat, they hit the remainder of the kid’s trail and had a blast.
If you build it they will come, but make sure you are covered. Two of the kids showed up without helmets so I made them stop and grab their helmets.
Safety first. Make sure they wear their gear as well as have permission to ride the trails. Also clearly state the rules for riding the trail and my suggestion is that you have to be present in order for them to ride it.